Funny thing about having cancer, is that you don't just have cancer... You have cancer and side effects from treatment and all the other shit that is going on in your life already.
FFS I'm tired.
Saturday, July 21, 2018
Monday, June 18, 2018
BCG
A few notes on my first BCG (Bacillus Calmette-Guerin (aka Pumping a live Tuberculosis Virus up my dick (Ok, it's not TB, but similar, actually used as a TB vaccine (but still nasty ass shit)))).
Anyway, was nervous about having to hold my urine in for 2 hours, turns out that when you have bladder cancer, you pee a lot. Excessive urination is a symptom of the disease, but is also a symptom of just about every treatment/imaging/diagnostic they have thrown at me so for.
The good news is that it was actually easy to hold. And (fingers crossed, wood knocked) so far I don't have much in the way of side effect. Just a bit tired, and woozy.
I'm finding that editing posts is working better in some ways than making new ones.
Started to feel worse as the week went on. Very tired and waves of nausea. Feeling better now, but had a rough few days. And man, my work productivity is in the shithole. :(
Tuesday, June 12, 2018
Cancer
So, I have cancer.
I am going to be talking it here for a while mostly as a way of sorting it out for myself. Since it is 2018, nobody reads blogs anyway.
But I'm sure I have friends and family still reading blogs like its 2003.
Anyway, first things first, er, middle things first?
Diagnosis:
Stage 1 Bladder cancer, High Grade, multiple sites, one of the siteshas had multiple tumors.
And now the timeline (I'm thinking I will update this post):
I am going to be talking it here for a while mostly as a way of sorting it out for myself. Since it is 2018, nobody reads blogs anyway.
But I'm sure I have friends and family still reading blogs like its 2003.
Anyway, first things first, er, middle things first?
Diagnosis:
Stage 1 Bladder cancer, High Grade, multiple sites, one of the sites
And now the timeline (I'm thinking I will update this post):
- October 5, 2013: I had blood in my urine after a run.
- October 5, 2013: Urinalysis showed blood, all else normal.
- October 7, 2013: Blood tests, normal.
- October 9, 2013: More blood tests, normal.
- October 10, 2013: CT Scan - "Unremarkable CT urogram".
- October 13, 2013: More blood in urine + pain.
- October 21, 2013: Cystoscopy - "Slightly engorged vessels in prostate/sphincter, to tumors. Clear efflux"
- --- Time goes on, more blood off and on, told not to worry about it ---
- February - March 2018: Start to have blood in urine after every run
- March 21, 2018: Blood in urine after run, and continuing blood after every urination. Sometimes with clots - Fun!
- March 26, 2018: See urologist.
- April 4, 2018: CT Scan - "Lobulated hypervascular mass arising from the posterior surface of the bladder on the right measuring 25 X 15 X 12mm"

- April 26, 2018: Cystoscopy - Tumor noted.
- May 4, 2018: Transurethral Resection of Bladder Tumor (TURBT): "3-cm papillary bladder lesion on the right floor of the bladder", "There were also numerous satellite lesions surrounding this", "another papillary lesion that was subcentimeter lesion along the left posterolateral wall of the bladder"
- May 4, 2018: Pathology Report - "HIGH-GRADE PAPILLARY UROTHELIAL CARCINOMA, INVASIVE INTO LAMINA PROPRIA"
- May 17, 2018: Postoperative appointment - Received diagnosis. Treatment plan: 6 week course of immunotherapy. BCG directly to the bladder. Starting after the bladder heals from surgery.
- June 12, 2018: White blood cells in urine (Staph infection from catheter).
- June 18, 2018: BCG Treatment #1 - not much for side effects
- June 25, 2018: BCG Treatment #2 - AKA how to explain to the painting crew who speaks mostly Spanish that my toilet will be toxic for 30 minutes after I pee.
- July 2, 2018: BCG Treatment #3 -
- July 9, 2018: BCG Treatment #4 -
- July 16, 2018: BCG Treatment #5 - Oh, joy blood clots in urine
- July 24, 2018: BCG Treatment #6 - 101 fever by the time I got home, abdominal pain threw the night. Things better in the morning. Blech!
- September 7, 2018: Transurethral Inspection of Bladder and Biopsy - No tumors noted, 3 samples taken.
- September 21, 2018: Large blood clot, and dark red urine.
- September 27, 2018: Biopsy results in, no cancer detected. On a 3 month check up schedule.

Saturday, February 21, 2015
The Need For Speed(ometer)
So, the sprite (see last post) needs a lot of work. I know, you're shocked!
One of the issues is the speedometer does not turn. Easy enough, the speedometer cable was rusted solid. However the end that connects to the transmission at the "Speedometer Pinion Gear" got striped out when the cable froze... I think. The problem is that I knew what my "Speedometer Pinion Gear" looked like, but I did not know what a "Speedometer Pinion Gear" was supposed to look like as I could find no pictures on the innertubes as to what a "Speedometer Pinion Gear" is supposed to look like at the business end. All the pictures conveniently show it from an angle that does not show it.
They all look something like this:
See here: austin healey sprite transmission speedometer pinion gear
So, I ordered one on e-bay and it looked just like that one I already had :(
But I still was not 100% sure that it was broken. I wrote the seller and he sent me another one (I now have 3) and low and behold (I'm sure that's the correct idiom) the 3rd one looks just like I thought it should
So to correct for the internets lacking in the correct image to help with this repair: Austin Healey, Sprite, MG, Midget, Austin Motor Company, British Motor Company A-Series Morris, Speedometer Pinion Gear, Transmission, Stripped, Speedometer Cable:
Note: The one on the left is round (stripped) while the one on the right is square (fine).
Now, I just need to replace the actual speedometer :(
They all look something like this:

See here: austin healey sprite transmission speedometer pinion gear
So, I ordered one on e-bay and it looked just like that one I already had :(
But I still was not 100% sure that it was broken. I wrote the seller and he sent me another one (I now have 3) and low and behold (I'm sure that's the correct idiom) the 3rd one looks just like I thought it should
So to correct for the internets lacking in the correct image to help with this repair: Austin Healey, Sprite, MG, Midget, Austin Motor Company, British Motor Company A-Series Morris, Speedometer Pinion Gear, Transmission, Stripped, Speedometer Cable:

Note: The one on the left is round (stripped) while the one on the right is square (fine).
Now, I just need to replace the actual speedometer :(
Sunday, April 13, 2014
A Life Goal: AKA, A Stupid Decision, AKA, the Strange Things People Do.
So, Uncle Eel went out and bought himself a 54 year old car! When he was a little 16 year old eel, he saw a picture of a BugEye Sprite at Toad's house and has not been the same since.

So he got one
Well, old Eel is not exactly a rich man, not exactly starving either, but somewhere between. He can buy a classic British sports car... But not one in pristine condition. The above example of a 1960 Austin-Healey Sprite cost about 1/2 what a fully restored car would be. And thus needs some work... A lot of work.
Well, the car showed up not exactly drivable (and almost fell off the truck, but that is a story for another time). Todays tail is one of hood hinges. It seems as though the car (henceforth referred to as Hugh) had at some front end damage (not disclosed by the seller. Grrrrr! (but moving one))) and the hood did not fit correctly:
The hood is sitting so high and forward that it did not hit the latch and was only staying closed by the good grace of gravity

As a result of this, the tyre (hay, it's English) was rubbing against the fender (the hood (properly "bonnet") and fender are connected)
The hinge it turns out had been for some unknown reason (Bubba owned a welder and wanted to use it?) had been cut and welded back together.
Note how closely the shape of the old hinge matches the new part. ($50, and stamped from the original die)
A couple of hours of swearing, and being a pill towards my lovely assistant. Hugh is back together again and the rear of the fender no longer drags on the tyer (still Brittish) and the hood latches correctly (almost)
Next up, fixing the front of the fender from rubbing... Is this what the hinge hack was attempting to repair?

Well, old Eel is not exactly a rich man, not exactly starving either, but somewhere between. He can buy a classic British sports car... But not one in pristine condition. The above example of a 1960 Austin-Healey Sprite cost about 1/2 what a fully restored car would be. And thus needs some work... A lot of work.
Well, the car showed up not exactly drivable (and almost fell off the truck, but that is a story for another time). Todays tail is one of hood hinges. It seems as though the car (henceforth referred to as Hugh) had at some front end damage (not disclosed by the seller. Grrrrr! (but moving one))) and the hood did not fit correctly:


The hinge it turns out had been for some unknown reason (Bubba owned a welder and wanted to use it?) had been cut and welded back together.

A couple of hours of swearing, and being a pill towards my lovely assistant. Hugh is back together again and the rear of the fender no longer drags on the tyer (still Brittish) and the hood latches correctly (almost)

Next up, fixing the front of the fender from rubbing... Is this what the hinge hack was attempting to repair?
Thursday, February 14, 2013
I heartz you.

So, it's valentines day, and my sweetheart wants us to make gifts for each other. This reminded me of something my dad made years ago:

I still don't understand how he made this. Most LEDs have a forward voltage of about 1.7V... Ok, an LED is not just a fancy light bulb, LED stands for Light Emitting Diode. A diode is one of the basic electronics components. It acts as kind of a switch, if the voltage is below a certain point, the current will not flow (switch off), once a voltage has been hit current flows (switch on) in the case of an LED, light is also produced. The other neat trick that an LED has, is that this is not symmetric, the reverse voltage is much higher than the forward voltage so it can be used to say, no Mr. Electron, you can't go that way, only this way.
But, anyway, as I was saying, I don't understand what my dad did here, cuz as I was saying, most LED's have a forward voltage of 1.7V, and he has 8 LEDs connected to a 9V battery: 9V/8LEDs = 1.125 V/LED. Did he have a source of 1V LEDs?
It is a cool idea and the most common LEDs are Green and Red (was not until the 90s that blue came down below 10$ each (and yellow does not count, it's ugly)), and I figured, hey Green goes with an X-Mass tree, so red would be great for a Valentines heart.
The first step is to "draw" a heart:

Then I printed it out on a piece of paper so that it would be about 2.5 inches (that is 6.35 cm for my civilized readers) square(ish). Next I hand drew 10 points where LEDs will go. I made this intentionally not quite match up. Our brains like to fill in the spaces and 10 points does not quite a heart make, so I am counting on the brain to fill in the the holes on each side by knowing were the points are on the other side.:

Well, I am actually making two parallel circuits here each with 9V/5LEDs = 1.8V/LED Just over the forward voltage. This will last until the battery is down to 8.5 volts, which for a "9V" is pretty durned dead.
The circuit:

Uncle Eel, you had better stick to mechanical engineering, that is not a circuit, that is a circle!
True, but lets put some more detail into it:

Now we can see that the LEDs are in opposing directions on each side of the heart. So the electrons can only travel one way for one side, and the other way for the other side, making each side of the heart its own circuit that is only a part of the whole (I actually did not intend for that bit of symbolism, I just wanted more than 5 lights, I do so like it when the universe is poetic).
So, the design is done, lets go out to the shop and start building.
The first thing to do is pick out my LEDs. In looking over my collection I had 2 to pick from that were red and I had more than 10 of.
I bread borded 5 of each to see what they looked like:


To get it all straight we are going to make a jig. So, we glue the template to a pice of scrap wood. And drill out the locations of the LEDs:


dig my new drill press!

Then we put the LEDs in place, and start soldering and clipping... err clip first, then solder. Note the direction and remember that the LEDs on the left are to be installed backwards from the ones on the right.

Soldering done.

See, I told you it would work... And you were worried, I knew it would work the whole time... Phew!

Add the 9V connecter:

Finished!

Monday, July 2, 2012
It's Pronounced Lie-Berry
So my bff/gf/housemate and all around wonderful human being is studying to be come a lie-berry-an. So, I figured I would get her her very own lie-berry (yeah, I just correctly used the same word twice in a row).
Enter the Little Free Library.
The first step in any big engineering project is the drawings (actually, that is close to the last step, but who is telling this story anyway??? Shutup and listen... er, read)

Now we frame it:


 And yes, it is very hard to work in the shop on a nice day with the view of my hammock.
But, no fear, I put up the paneling:

Now for the calking and edging to "waterproof" it:

I unfortunately bought too much edging. Grrrr:

And my 20 Year old sanding belt failed.
 They just don't make tools to last :(
Now for Paint:
 Soo cute!
 Take that! And PAINT!
 The paint chip was more subdued...
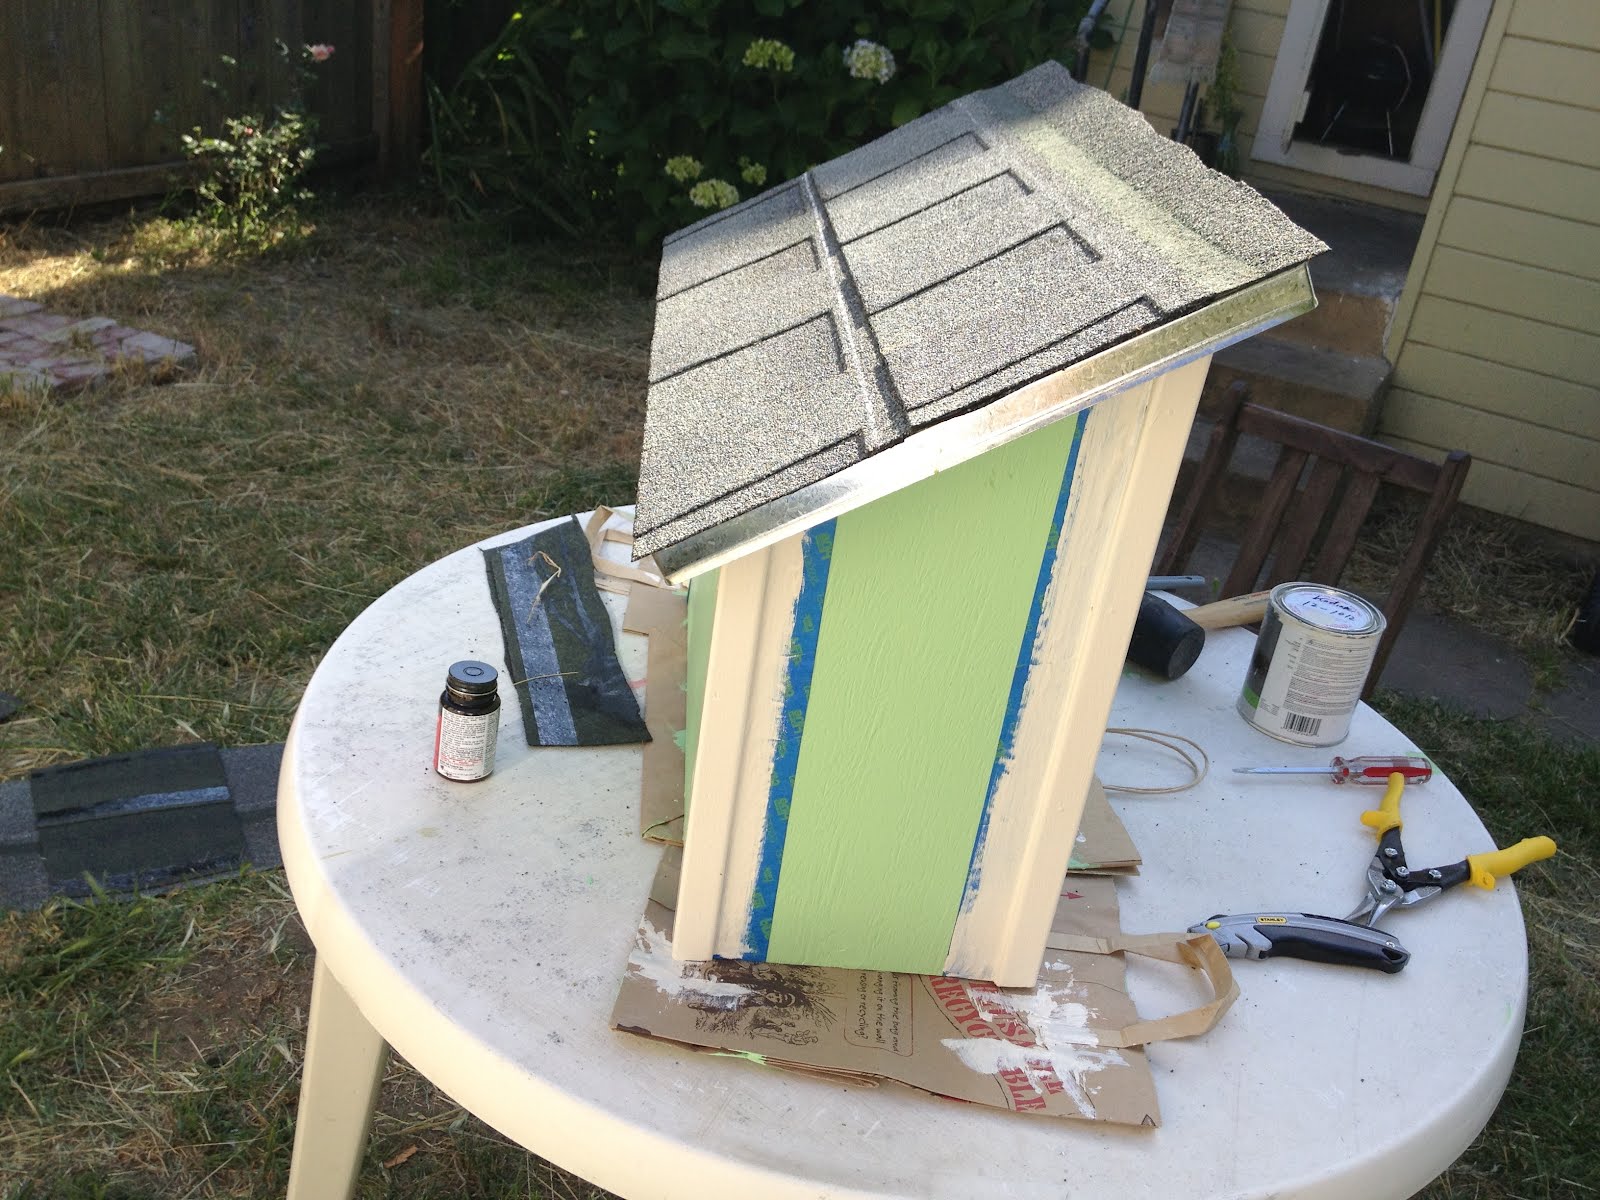
Add a roof:

and a door:

Plant it in the ground:

Seed it and see what will grow...

The first step in any big engineering project is the drawings (actually, that is close to the last step, but who is telling this story anyway??? Shutup and listen... er, read)

Now we frame it:


But, no fear, I put up the paneling:

Now for the calking and edging to "waterproof" it:

I unfortunately bought too much edging. Grrrr:

And my 20 Year old sanding belt failed.

Now for Paint:


Add a roof:
and a door:

Plant it in the ground:

Seed it and see what will grow...

Subscribe to:
Posts (Atom)
