Thursday, February 14, 2013

I heartz you.


So, it's valentines day, and my sweetheart wants us to make gifts for each other. This reminded me of something my dad made years ago:

I still don't understand how he made this. Most LEDs have a forward voltage of about 1.7V... Ok, an LED is not just a fancy light bulb, LED stands for Light Emitting Diode. A diode is one of the basic electronics components. It acts as kind of a switch, if the voltage is below a certain point, the current will not flow (switch off), once a voltage has been hit current flows (switch on) in the case of an LED, light is also produced. The other neat trick that an LED has, is that this is not symmetric, the reverse voltage is much higher than the forward voltage so it can be used to say, no Mr. Electron, you can't go that way, only this way.
But, anyway, as I was saying, I don't understand what my dad did here, cuz as I was saying, most LED's have a forward voltage of 1.7V, and he has 8 LEDs connected to a 9V battery: 9V/8LEDs = 1.125 V/LED. Did he have a source of 1V LEDs?


It is a cool idea and the most common LEDs are Green and Red (was not until the 90s that blue came down below 10$ each (and yellow does not count, it's ugly)), and I figured, hey Green goes with an X-Mass tree, so red would be great for a Valentines heart.

The first step is to "draw" a heart:


Then I printed it out on a piece of paper so that it would be about 2.5 inches (that is 6.35 cm for my civilized readers) square(ish). Next I hand drew 10 points where LEDs will go. I made this intentionally not quite match up. Our brains like to fill in the spaces and 10 points does not quite a heart make, so I am counting on the brain to fill in the the holes on each side by knowing were the points are on the other side.:
10? Uncle Eel you said 8 was too many but now you got 10?
Well, I am actually making two parallel circuits here each with 9V/5LEDs = 1.8V/LED Just over the forward voltage. This will last until the battery is down to 8.5 volts, which for a "9V" is pretty durned dead.


The circuit:

Uncle Eel, you had better stick to mechanical engineering, that is not a circuit, that is a circle!

True, but lets put some more detail into it:

Now we can see that the LEDs are in opposing directions on each side of the heart. So the electrons can only travel one way for one side, and the other way for the other side, making each side of the heart its own circuit that is only a part of the whole (I actually did not intend for that bit of symbolism, I just wanted more than 5 lights, I do so like it when the universe is poetic).


So, the design is done, lets go out to the shop and start building.
The first thing to do is pick out my LEDs. In looking over my collection I had 2 to pick from that were red and I had more than 10 of.
I bread borded 5 of each to see what they looked like:

The smaller ones are brighter, but you can't see in the photo, they are not that consistant. Also, the softer light of the bigger ones is kinda nice, so lets use those.


To get it all straight we are going to make a jig. So, we glue the template to a pice of scrap wood. And drill out the locations of the LEDs:

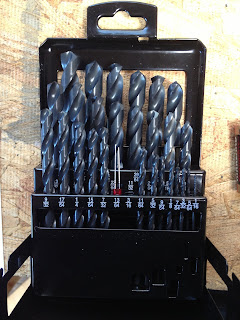

dig my new drill press!


Then we put the LEDs in place, and start soldering and clipping... err clip first, then solder. Note the direction and remember that the LEDs on the left are to be installed backwards from the ones on the right.


Soldering done.


See, I told you it would work... And you were worried, I knew it would work the whole time... Phew!


Add the 9V connecter:


Finished!


Monday, July 2, 2012

It's Pronounced Lie-Berry

So my bff/gf/housemate and all around wonderful human being is studying to be come a lie-berry-an. So, I figured I would get her her very own lie-berry (yeah, I just correctly used the same word twice in a row). Enter the Little Free Library.

The first step in any big engineering project is the drawings (actually, that is close to the last step, but who is telling this story anyway??? Shutup and listen... er, read)

Now we frame it:


And yes, it is very hard to work in the shop on a nice day with the view of my hammock.
But, no fear, I put up the paneling:

Now for the calking and edging to "waterproof" it:

I unfortunately bought too much edging. Grrrr:

And my 20 Year old sanding belt failed.
They just don't make tools to last :(
Now for Paint:
Soo cute!
Take that! And PAINT!
The paint chip was more subdued...
Add a roof:

and a door:

Plant it in the ground:

Seed it and see what will grow...

Saturday, April 7, 2012

Round Peg in a Square Hole

So, when I was a small eel I had a bunch of tests including the classic board with a bunch of shaped holes that have corresponding pegs that go in each hole. Well, I was always quite good at spacial relations, and always a smart ass. So, I finished all but the round and square pegs in a better time than most adults would get...
then spent about a minute "trying" to get the round peg into the square hole.

Cut to 30 years later, and my old thermostat is on the fritz
I wanted replace it with a fancy new Nest thermostat:

But it does not work with my old millivolt wall furnace.
So, I wired a new outlet (yes Mr. Inspector, I did put a new circuit in for it) and attached a 110V to 24V transformer:
Then sent both prongs of the 24V up to the thermostat (Rh and C), and sent the heater control wire back down (W1).
When the thermostat decides to turn the heat on, it does it by shorting Rh to W1, so I wired a relay to W1 and C (C on the transformer side)
Then wire the other side of the relay to the heater
Velcro it up to the wall
"Tidy" the whole mess up
Plug the thermostat into the socket:
And fire it up
Later I will tell you how it worked out with the poor lady administering the test, but that will require you ply me with bourbon first.

Monday, November 21, 2011

I am Having a Hard Time

I am having a hard time understanding the venom that is coming from people who have seen the pictures of the #OWS protest at the University of California at Davis. How can people see images if kids being sprayed in the face with military grade pepper spray. How can people see these images of passive kids. How can people see these images and know they are passive kids and spew venom directed at the children? The people spewing venom know they are passive. The people spewing venom know they are kids. I know this because they say it. The use the word passive. They use the word kids. And they still are blinded by fury at the image. They are furious at the kids. But are they? Or do they feel anger at the image just as I do? Do they see a picture of a person who meant no harm being hurt and get angry at that image just as I do? Is the difference in our response not the anger but another pice of knowledge that they have? Is it that they know deep down that authority is protective? They know deep down that police are good? Is the difference that I just add another word into that sentence: Police are usually good. Just as I know that police are people, and people are usually good. The difference may be that I can look at that picture and know that this is astonishingly abhorrent. This is not the behavior of somebody who is protecting and good. This is somebody who has fallen down the trap of Milgram and Zimbardo. The lesson I am learning tonight, is that the person who is expressing outrage towards the kid may vary well be expressing the same outrage I am feeling, but unable to pair their outrage with the other knowledge that they have, so the anger comes out twisted and misdirected. This unconscionable person becomes a person... Or maybe he is just a jerk.

Sunday, June 12, 2011

I Have the Power

So, I have not written in a while. I have been a bit busy doing things like


Running 1/2 Marathons (1:43:43 in the rain. 23rd overall, and 4th in class)


Traveling internationally for work (Taiwan, and Dresden (twice))


Breaking machine tools.


Oh, yeah, and buying a house!

Well, the house is small. I am not talking 1200 ft^2 small, I am talking 554 ft^2 small!
So, one of the first things I did was have a shed built in the back to use as a workshop (The technical term is Calculariam), and NOT for storage!!! Well the city (town) I live in lets me build 120 ft^2 without a permit (Over 1/5th the size of the house). But you can't run power out to it (Sadface). Well, problems have solutions:


Some nuts, bolts, angle, and furniture tips from the hardware store (About $20)


Some selections from my Zip-Tie collection,


And some from my back up Zip-Tie collection


Make a lovely mount for a solar panel (15W for 80$).


Mounted on the roof. Everything I have done on this is with an eye towards expanding the system. Now to hook up the running systems:


I covered it up during this part as so not to hurt myself (try licking a car battery). It was still pushing out about 3V so I could make sure all my connections were good, but with almost no current, so I swore a lot less.


To charge the battery (I have a tiny one in place temporarily, but have a big ass (I think that is the brand) one at work (Free), regulate the power, and protect the panels after sunset ($20, good for 100W).


A 50W inverter that I have had kicking around for 15 years or so (and they tell me I should trow things out)


Light provided by a 5W 12V LED bulb ($12). Don't worry, I cleaned up the wiring.


Half a Saturdays work, finished by sundown. Total cost: $132


And finally, no job is done without one of these :)